Summer is drawing to an end soon, and as a result, I've been faced with the task of removing the collective tan lines from some of the models in my photos recently...
I've had a method for doing this for awhile, but did a quick Google search to see if anyone had any other methods for removing them, but didn't find much - other than suggestions to keep your models indoors, or using the healing brush. While the healing brush might solve the problem, it also seems to involve quite a bit more work, and also replaces the original skin textures in the "healed" area. This isn't always ideal.
So - here's my method for removing tan lines from your photos, using photoshop. This example uses a black and white image, but you can use a simlar process with color images. The only difference I've been faced with is some of the tones might be a bit off, so you may have to add a color correction layer and hand color the re-tanned area using a color sample from a tanned area of skin. This does work perfectly for black and white images though.
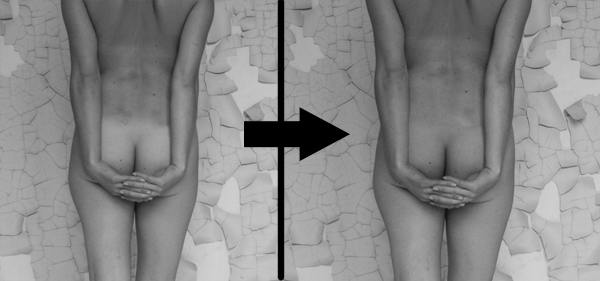
Here's a before and after image -
First, open the photo using photoshop.
|
|
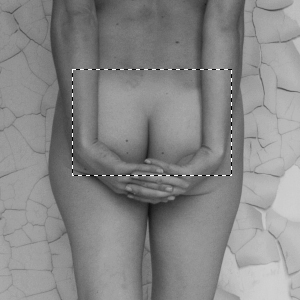
Using any of the selection tools, select the area that has the lighter skin tones. You'll want to select an area larger than the tan line itself, so that you have room to feather. Copy the selected area. Next, without removing the selection marquee, paste the area that you have copied. By not removing the selection marquee, you'll ensure that the area you paste is lined up with the area that you've copied. Basically, you are creating a new layer, just with the selcted area, properly aligned with the original layer. |
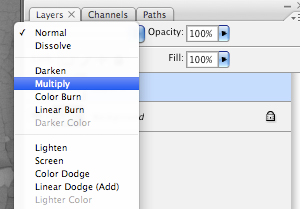 |
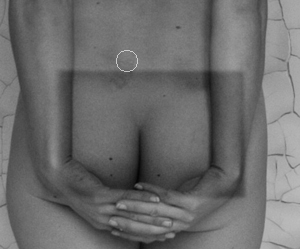
Next, select the new layer in the "Layers" panel. Change the blending mode to "multiply", as shown at left. You'll see that the selected area is now significantly darker. To correct for this, adjust the opacity of the new layer. This will just be a rough adjustment initially, and it can be adjusted when everything is complete. |
|
|
Using the eraser tool, start erasing the edges of the new layer.
It is best to use an eraser brush that has a lower "hardness" value. This lets you feather your edges, which will result in a much smoother transition between the tanned and untanned areas. Erase all of the darker areas until the skin tones are relatively even. You may have to adjust the opacity at this point to ensure that the skin tones match up. |
|
|
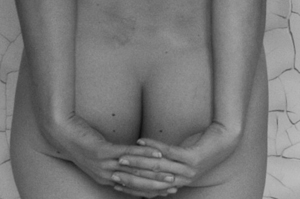
This is the end result.
At this point, I'll create a merged copy of the image, either by selecting all, then copying merged, and pasting, or just by merging all layers through the "layers" menu. After doing this, additional minor corrections can be made using Photoshop's "healing brush". You can see the final result in the first image, above, where I removed some minor skin tone variations around the corrected area. |
Again, with color images, you may find that the multiplied layer might produce too much red or some other color shift in the corrected area. This can be fixed by creating an additional layer, then selecting "color" as the blending option. You can then use the eyedropper and choose a similar skin tone, then paint it into the color layer.